 |
| The Goodey Knot |
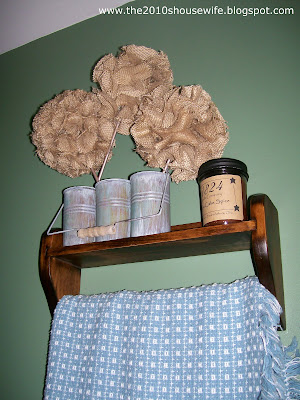
At the end of the day I love how they turned out but man, I didn't think I was ever going to get them finished! It took sooooo long to cut all the burlap circles and each topiary took soooo many circles.
Here were the steps (using some of The Goodey Knot's photos because I forgot to take my own- sorry!):
 | ||
| Spray paint some wooden dowels |
 | |
| Stick foam balls into the dowels |
Then cover the Styrofoam balls with strips of burlap.
Cut out a boat load of burlap circles using a can or cup as a template.
Fold each burlap circle into a flower shape and sew it together at the bottom. (I made one topiary by rolling the circles rather than folding- the one on the left- just to see how that would look. It ended up taking way more circles than the others and was thus way heavier so I'm not sure I would recommended it unless you really preferred the look.)
I clipped the point at the bottom of the circles off to give myself a wider surface to hot glue onto the burlap balls.
Hot glue each flower onto the ball until it's covered.
Sit back and admire your work!
Linking Up @ Today's Creative Blog & The Thrifty Home & Savvy Southern Style


I love them!! But I know what you mean about trying something, getting involved and finding out how time consuming it is... but you did a great job and They are soooo cute~~~
ReplyDeleteLooks great-I think it's was worth the time and mess (easy for me to say)
ReplyDeletethis looks awesome! worth the time:) would love for you to share at "tell me tuesday"
ReplyDeletejaysonandashley.blogspot.com
xoxo
ash
Those are really a cute idea. thanks for sharing at the newbie party.
ReplyDeleteThose are awesome! I would love it if you would link up to my Tuesday Confessional link party going on now: http://www.craftyconfessions.com/2011/07/tuesday-confessional-link-up-2.html. I hope to see you soon!
ReplyDelete~Macy from Confessions of a SAHM
very pretty!
ReplyDeletemegan
craftycpa.blogspot.com
So cute! I love them leaning casually in your bucket containers.
ReplyDeleteYou did a great job.
ReplyDeleteWow, i love these!
ReplyDeleteAdorable! If you knew how much time it would take, would you have actually made them?
ReplyDeleteReally cute---I saw something similiar once with tulle but I really like the burlap!
ReplyDeleteliZ
(simplesimonandco)
Cute idea! I may try a similar project. :)
ReplyDeleteThe triple can you used for the base of the topiaries is completely cute! It totally enhances the burlap tops. Thanks for sharing!
ReplyDeleteSuper cute! I love them : )
ReplyDeleteFound ya on Tea Rose Home : )
Come check out my awesome giveaway!
http://dahlingkadie.blogspot.com/2011/06/giveaway.html
Those look great! I love burlap. I'm glad you stuck with it. Thanks for linking up!
ReplyDeleteVery very cute!!! love burlap, but yes, looks like a ton of work :) they are beautiful though :)
ReplyDeleteThose are really great! Thanks for the cute idea! Enjoy the weekend!
ReplyDeleteWaving from Our Back Porch,
Rebecca
Absolutely LOVE these and I'm definitely going to make some of my own. I also featured your tutorial on my Tattered Sisters blog with a link right back to your tutorial so that my readers can come and see this great project too. Thanks so much for sharing it!
ReplyDeleteThey came out great! Definitely worth all the effort!
ReplyDelete-caroline @ c.w.frosting
i LOVE these! Oh my gosh they are perfect! I featured you on my blog today for Mouth-Watering Mondays! Come check it out and feel free to grab a featured button! Thanks!
ReplyDelete-Nikki
http://chef-n-training.blogspot.com/
grt
ReplyDelete